Do you want to know how to fix the “Android Unfortunately Email Has Stopped” error?
Email is a professional way of communication, whether it’s for work or personal stuff. It’s an easy way to quickly send messages, documents, information, and more.
Using email, you can coordinate with your team, schedule the calls, and stay connected with your company. Plus, with email apps on your Smartphone, you can stay connected wherever you go.
However, it can be very frustrating when email apps crash, have syncing issues, or other errors. That’s why it’s important to know how to fix these common problems to keep your email running smoothly on your Android device.
In this post, we’ll show you different troubleshooting steps to resolve the “Unfortunately, Email has stopped” error on your Android device.
Without further ado, let’s get started.
Why Is Android Email Not Working?
Android email app issues can happen for different reasons.
- Internet Connection is Unstable: One of the common issues is that your internet connection is unstable.
- Outdated Email App: If your email app is outdated, you will see the common error.
- Email App Cache and Data: You can see this issue if your email app has too much cache and data.
- Sync Settings Not Configured Properly: Your email sync settings are not configured properly.
- Opens too Many Apps: If you have too many apps open at once, you can also see this error.
- Android System Issues: Sometimes, issues with the operating system on your device can also affect the performance of your email app.
These are the important factors that prevent email apps from working properly on your Android device.
Now, let’s look at how you can fix “Unfortunately Gmail Has Stopped Working” issues and get your email app running again.
How to Fix “Android Unfortunately Email Has Stopped” Error
1. Check Your Device’s Internet Connection
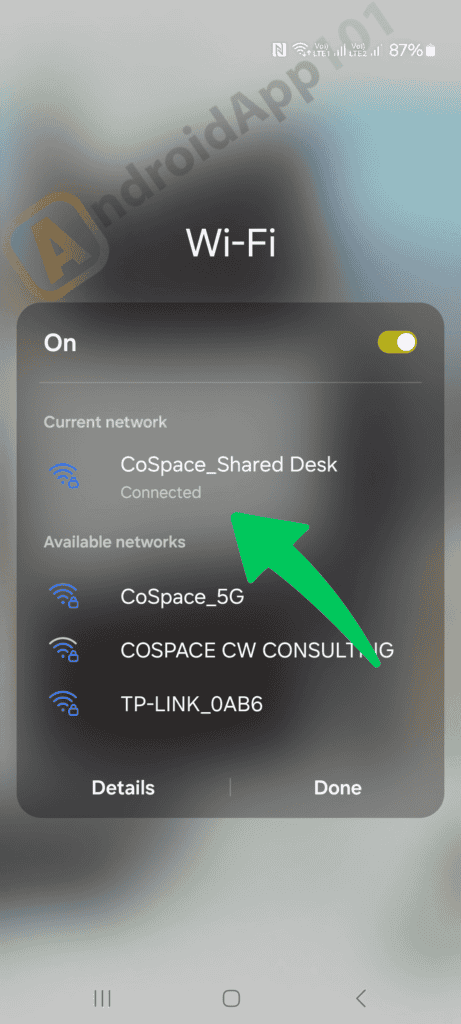
One of the most obvious reasons for this is the issue with your internet connection. You need to make sure that your device has a stable and reliable internet connection.
If you’re using Wi-Fi, try switching to mobile data or vice versa to see if it makes any difference.
If you’re still facing this issue, then try the second method of restarting your device.
2. Restart Your Android Device
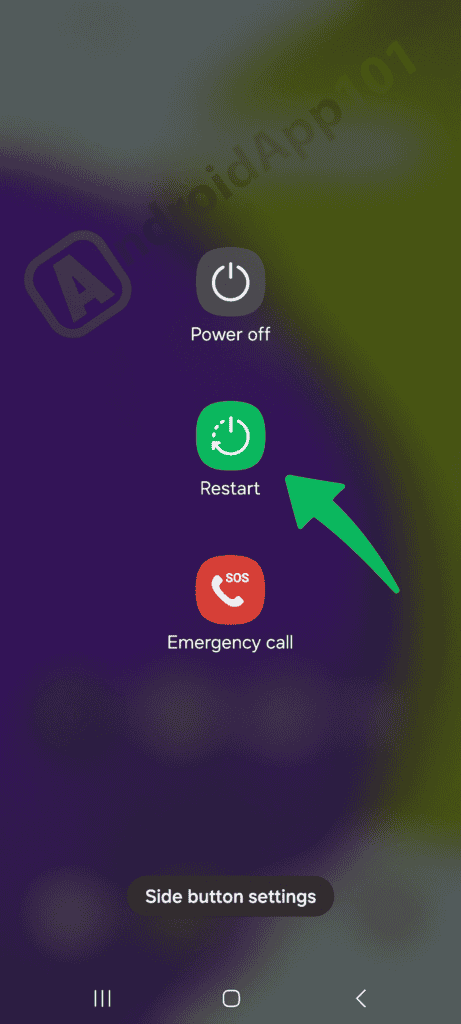
Restarting your Android device is an easy fix that can help resolve different app issues, including the “Unfortunately, Email has Stopped” error.
You just need to simply press and hold down the power button on your device, then select Restart from the options listed.
Once your device restarts, you can open your email again to see if the issue has been resolved.
If you’re still facing this issue, try another method, which is clearing the cache.
3. Clear Email App Cache
The cache in your email app stores temporary data to make it run faster. However, if there’s too much cache built up, it can cause issues with the app.
To clear your email app’s cache, you need to follow these steps:
1. First thing first, Go to Settings on your device.
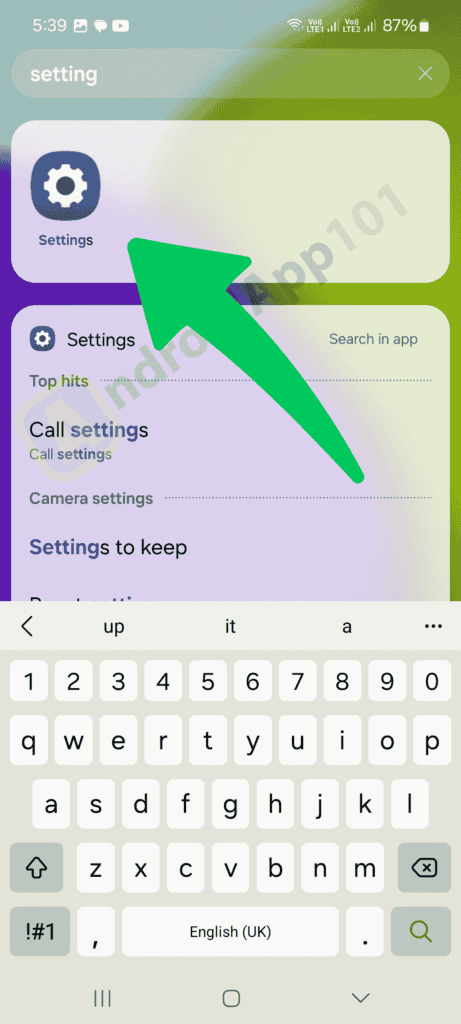
2. Next, navigate Apps.
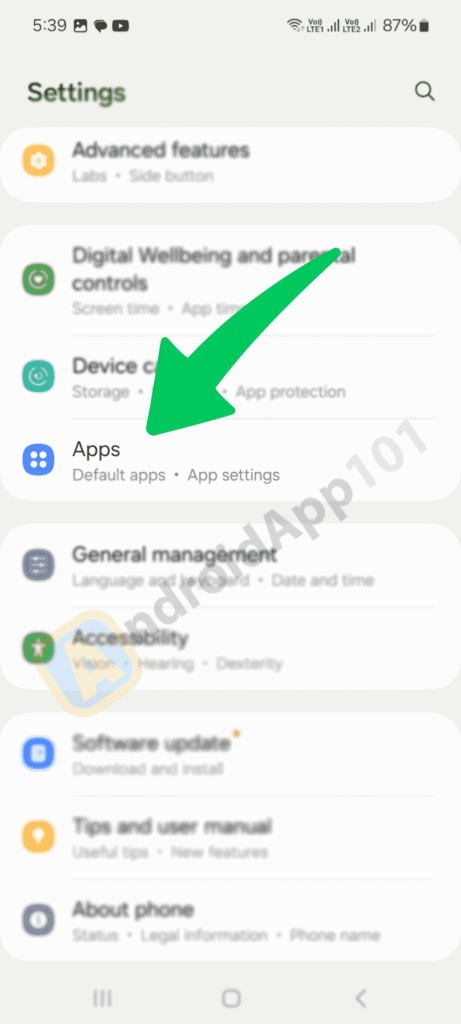
3. Find and select your email app from the list of installed apps.
4. Next, click on the Storage.
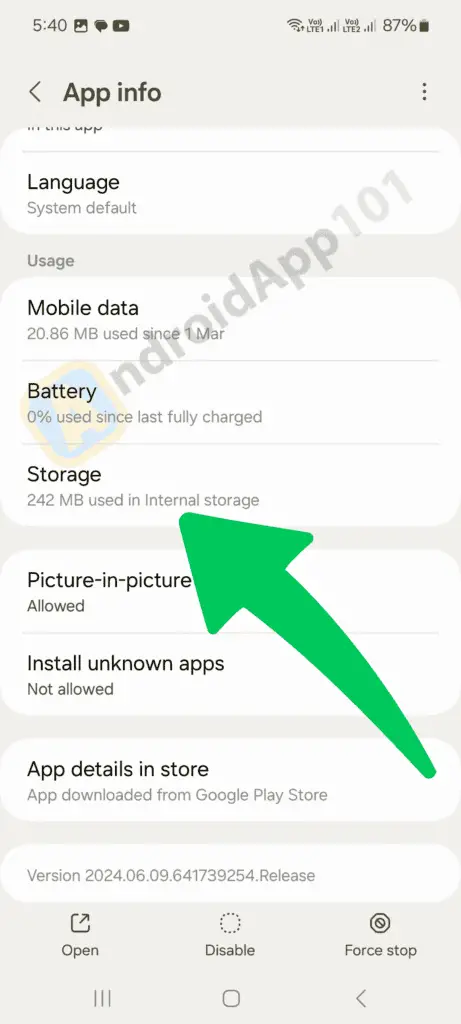
5. Next, you’ll see the Clear Cache option from the bottom right. Click on it.
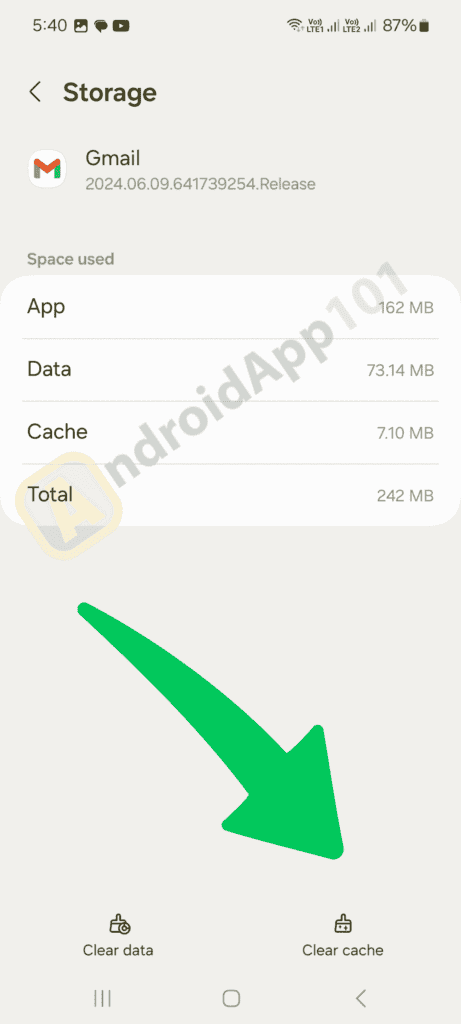
6. Lastly, once you have cleared the cache, check if the issue is resolved by opening your email app again.
Still, facing the issue? Try the next method for clear data.
4. Clear Email App Data
Clearing app data is a more difficult step than clearing the cache. You should only do it if other fixes aren’t working.
Keep in mind that clearing app data will log you out of your email account and reset any custom settings or preferences you’ve set up.
To clear your email app’s data, follow these steps:
1. First thing first, Go to Settings on your device.

2. Next, navigate Apps.

3. Find and select your email app from the list of installed apps.
4. Next, click on the Storage.

5. Next, you’ll see the Clear Data option from the bottom left. Click on it.
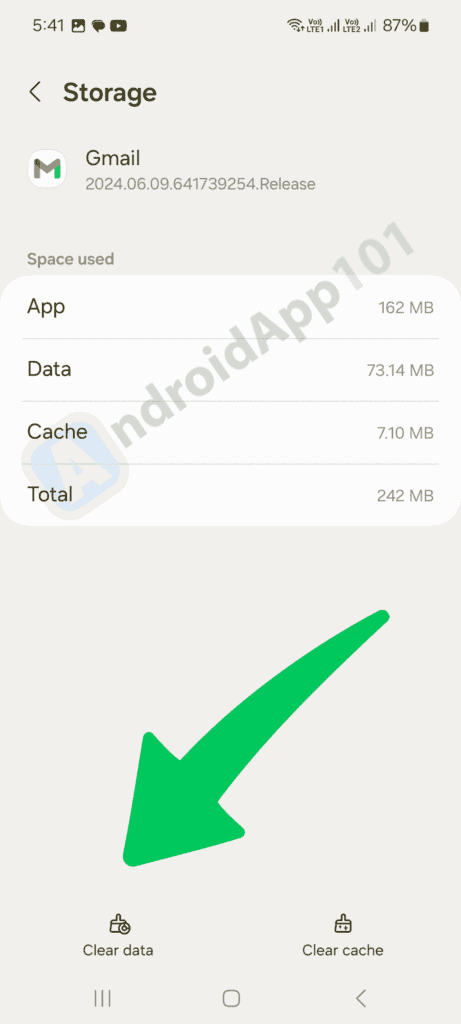
6. Lastly, once you have cleared the app data, check if the issue is resolved by opening your email app again.
Still, facing the issue? Try the next method about syncing settings.
5. Check Email Sync Settings
If your email sync settings are not configured properly, you’ll see the “Android Unfortunately Email Has Stopped” error.
To resolve this issue, you need to make sure that the correct account is selected for sync.
To check your email sync settings, follow these steps:
1. Open your Email App and click on the Three Vertical Lines in the top left corner to open the menu.
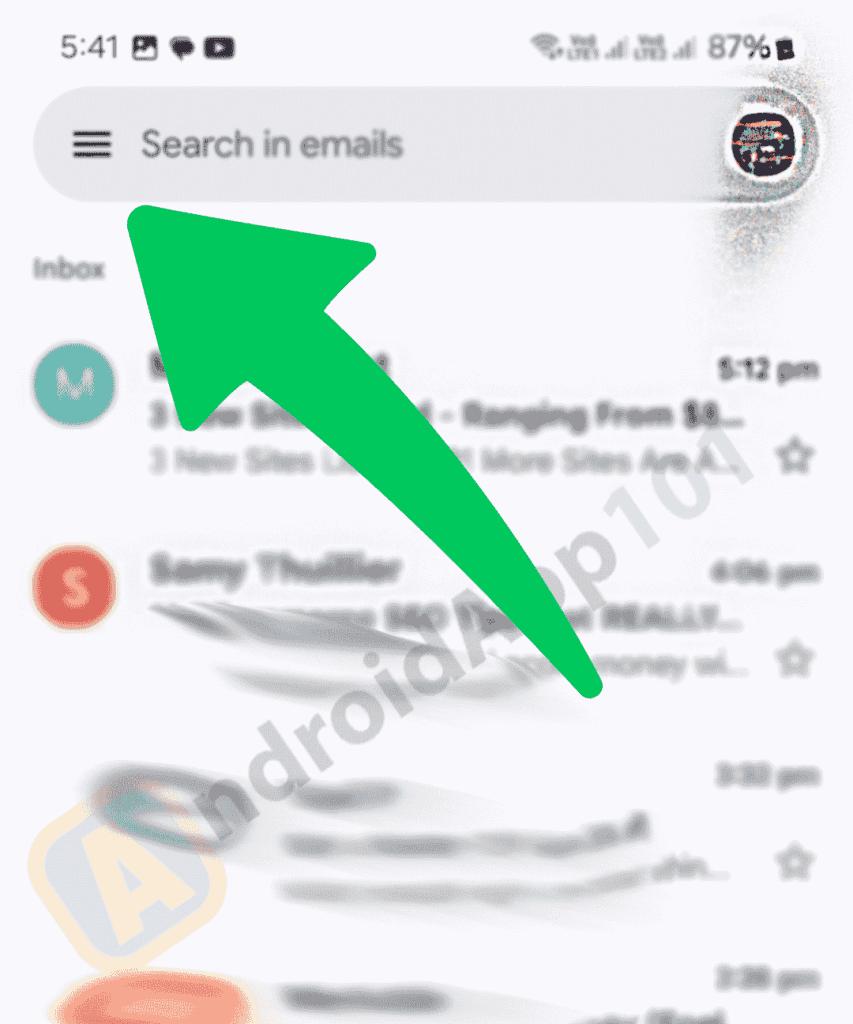
2. Select Settings from the menu options.
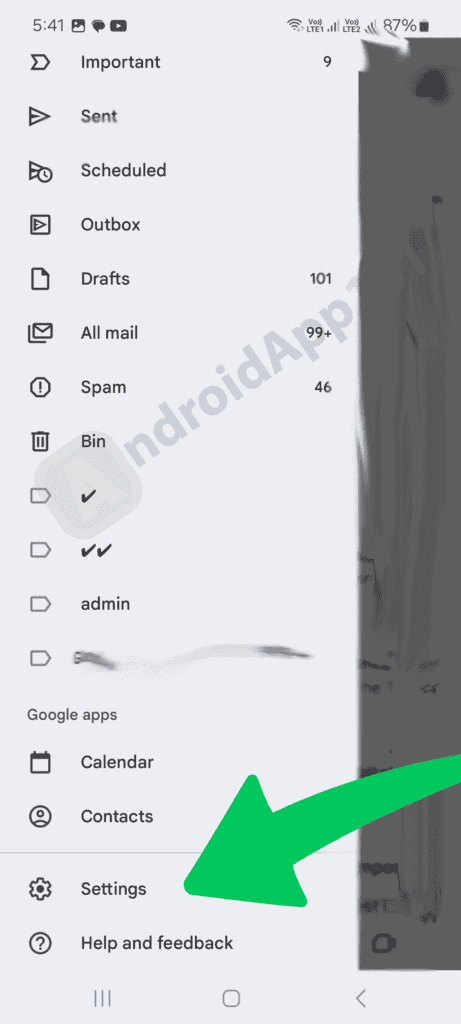
3. Click on your Email Account to open its settings.
4. Next, scroll down to find Sync Settings or Sync Frequency.
5. Make sure that the sync option is Checked.
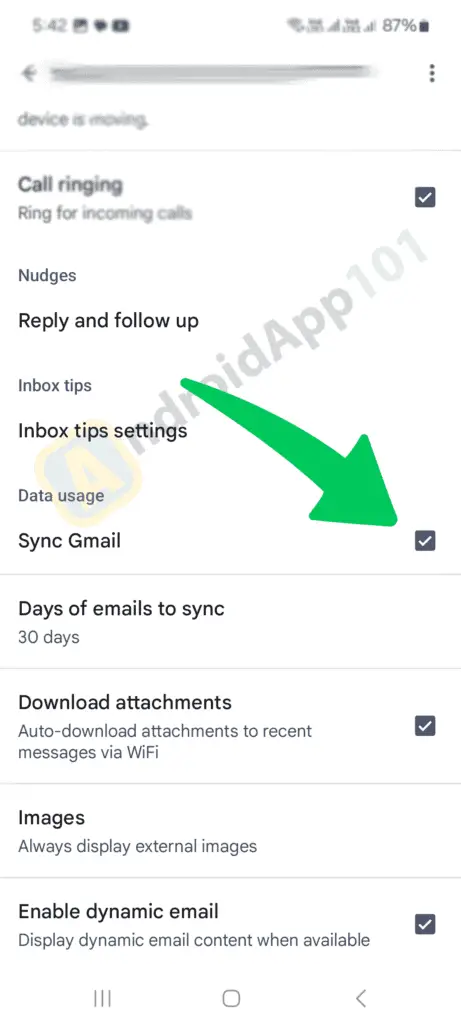
6. Once you have adjusted the sync settings, go back and check if the issue has been resolved.
Still, facing the issue? Try the next method about closing background apps.
6. Close Background Apps
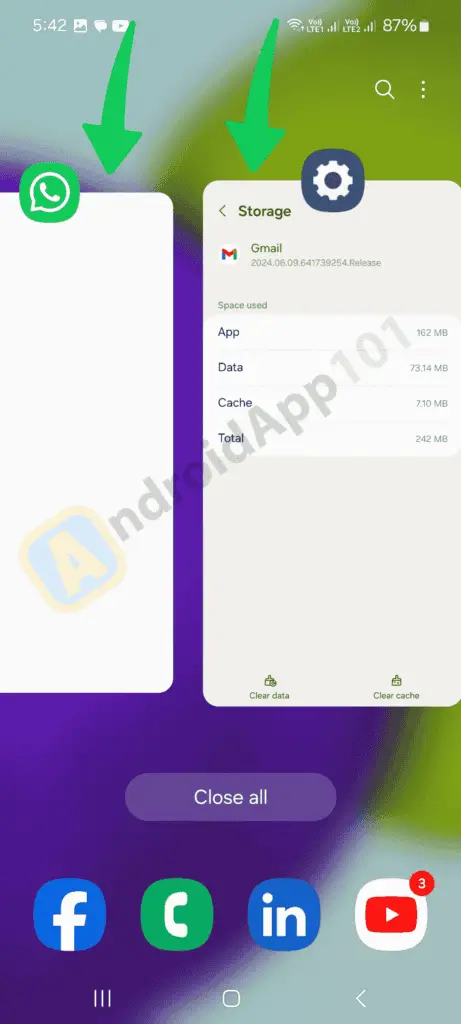
Background apps are also one of the reasons why you see the “Unfortunately, Email has stopped” error.
When too many apps run in the background, they can consume your device’s resources and cause performance issues.
To resolve this issue, you need to close unnecessary background apps to free up memory.
After closing the background apps, open your email app again to check if the issue has been resolved.
If the problem still exists, move to the next method of updating your email app.
7. Update Your Email App
Updating your email is another way to resolve this issue. An outdated email app can cause different issues on your device, including the Unfortunately, Gmail has stopped working error. To update your email app, you need to:
- First, open the Google Play Store on your device.
- Next, click on the Top Charts in the mid-center to open the menu.
- If there are any updates available for your email app, click on “Update” next to it.
- Once updated, open your email app again and check if the issue has been resolved.
If the problem still exists, move to the next method of checking device storage.
8. Check Device Storage
If your device’s storage is almost full, it can slow down the installation of your apps. To resolve this issue, you need to make sure you have enough free space on your device or SD Card.
You should clear up space by deleting unneeded files or moving them to an external storage device.
Once done, open your email app again and check if the issue has been resolved.
Still, facing the issue? Don’t worry; try the last method of performing a factory reset on your device.
9. Perform a Factory Reset
This method is not recommended; however, if none of the above methods work, you can use this one.
Performing a factory reset will delete all data on your device and restore it to its original default settings. Nonetheless, this can help resolve any software issues that may be causing the “Unfortunately, Email has stopped” error.
To perform a factory reset, follow these steps:
- First and foremost, Backup all your important data to an external storage device or cloud service.
- Next, go to Settings on your device.
- Scroll down to find the Accounts and Backup option.
- Next, click on the Reset option.
- Lastly, click on “Factory Data Reset” and then confirm your action.
After the factory reset is complete, set up your device again and check if the issue has been resolved.
What Should I Do if None of These Steps Resolve the Issue?
If none of these steps resolve the issue, you need to Contact your Email Provider’s customer support for further assistance.
They will give you specific guidance or help resolve server-related problems affecting your email app.
You can also try removing and re-adding your email account as a last option. Only do this if you are okay with setting up your email from scratch. If not, ask your email provider for help.
Note: Make sure to keep your email app updated, clear the cache often, and have enough storage on your device to prevent similar issues in the future.
Frequently Asked Questions (FAQ)
Why is my Android email app not working?
There are several reasons why your Android email app may not be working properly; this includes poor internet connection, not enough storage space, outdated app versions, corrupted cache files, incorrect sync settings, or issues with the email provider’s server.
How can I fix the “Android Unfortunately Email Has Stopped” error?
You can fix this error by using different methods: either you need to check your internet connection, restart your device, clear the email app cache, clear email app data, close unnecessary apps, update your Android email app, and more. By applying this method, you can resolve the issue.
What should I do if my email app keeps crashing?
If your email app keeps crashing, you need to start by checking your internet connection and clearing the app cache. You can also try restarting your device and updating the email app. If these steps do not work, you can contact the email provider.
Why should I update my email app regularly?
Regularly updating your email app is crucial because updates often include bug fixes, performance improvements, and compatibility enhancements that can help keep your app stable and functioning correctly.
What happens if I clear the cache of my email app?
Clearing the cache of your email app removes temporary files that may be causing issues. This process does not delete any of your personal data but can resolve problems related to corrupted data.
How do I ensure my email sync settings are correct?
To ensure your email sync settings are correct, open your email app, go to Settings, and make sure that sync is enabled.
What should I do if my device has insufficient storage?
If you have insufficient Storage on your device, you can free up space by deleting unnecessary files or deleting useless apps. You should keep at least 10% of your Storage free for good performance.
Can incorrect Android sync settings affect my email app?
Yes, incorrect overall sync settings on your Android device can affect your email app. You can verify that sync is enabled for your email account under Settings > Accounts and check for any data usage restrictions that may hinder email synchronization.
How can I resolve the “Unfortunately, Yahoo Mail has stopped” error?
You can resolve this error by checking your internet connection, clearing the app cache, updating the Yahoo Mail app, ensuring there is enough storage space on your device, and restarting your device.
Final Thoughts “Android Unfortunately Email Has Stopped”
We hope this article has helped you troubleshoot and resolve the “Android Unfortunately Email Has Stopped” error on your device.
By following the outlined steps, such as checking your internet connection, clearing the app cache, updating your email app, and ensuring sufficient Storage, you can maintain a smoothly functioning email app. If these tips don’t solve the problem, contacting your email provider or resetting your email account may provide the needed solution.
That’s it! We hope this article helped you to resolve the Android Email Keeps Crashing error on your Android device.
Meanwhile, you can also check out our blog for more Android tutorials.
What are you waiting for?
Start applying these methods today to keep your email communications seamless. If you have any queries, feel free to ask us via the comments section below.
That’s all! You can also check out How to Recover Deleted Videos From Android (An Easy Way) and How to Reinstall Android OS (An Exclusive Guide).

